Me and my ArrowA Review of Basic Mouse UseA mouse is an “easy” to use pointing device. You probably learned how to use a mouse the very first day you got a Windows computer. Now that you are comfortable with a computer, revisiting those first mousing lessons may be beneficial. The link below links to the Microsoft Mouse Demo http://windows.microsoft.com/en-US/windows-vista/Demo-Learning-to-use-the-mouse Microsoft included Solitaire in the Windows operating system since 1990. Solitaire proved useful in familiarizing users with the use of a mouse, such as the drag-and-drop technique required for moving cards. If you are new mouse user, a few games of solitaire may be very helpful to acquainting yourself with the mouse. The following sites might also be helpful to new mouse users. Mousing Around http://www.pbclibrary.org/mousing/intro.htm |
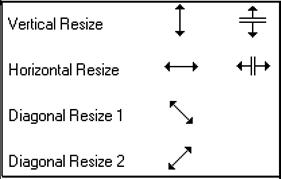
PointersThe mouse pointer often changes as you move the mouse around. These pointer changes are a form of communication. |
| An hourglass means the computer is busy and you need to wait. |
|
||||||
|
|
|||||||
|
|
|||||||
|
|
|
||||||
A circle with a line through means the action is prohibited. |
|||||||
Hovering |
|||||||
| Many older programs will give you information in the status bar (the bottom bar of the window) when you hover. One of the most important places to check the status bar is when you hover over a link in your internet browser. Hovering can also reveal tooltips. Tool tips appear after a brief delay and disappear after about 4 seconds. The status bar is loosing favor. Many programs have be rewritten without status bar upgrades. Hovering has taken on some exciting new changes with the PEEK function introduced in Windows 7 and Vista.
|
|
||||||
ClickingFirst off we should probably review that when you are told to CLICK or DOUBLE CLICK, we are talking about using the left button on the mouse. Most clicking is done with this left button because it is closest to your index (pointing finger) when you are gripping your mouse and easiest to use. If you are a lefty, you may have changed the orientation of the buttons in the control panel to be more convenient to you, in that case whenever I say left button I mean the button closest to your body. The double click requires 2 clicks in a given interval of time. The interval can easily be adjusted in the control panel. When to Click and when to double Click the left mouse button. |
|||||||
| There are four places where the double click is commonly used. These are. 1) Icons on the desktop, 2) icons in a folder, 3) items in a list box and 4) text. Icons are the pictures you see on your desktop or when you are browsing the contents of a folder. Icons can represent a program shortcut, a document shortcut, or the actual program or document you want to open. |
|||||||
|
|
|
||||||
| Clicking once on an icon while browsing a folder will select the item. Double clicking on an icon will open the application, document or folder. |
|
||||||
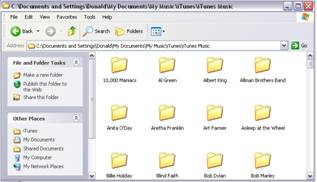
| Depending on the application, list boxes may also have a double click option. (A list box is a control that has one item per line and scroll controls on the side.
|
|
||||||
|
|
|||||||
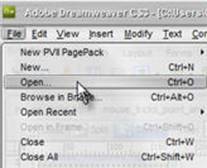
| Menu items are opened with a single click of the left mouse button. This applies to the menu words at the top of your application window. |
|
||||||
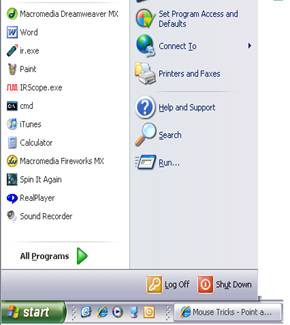
| This single click method also applies to menus items that are created with shortcut icons and quickstart icons on the taskbar. Click the Start button, and move your mouse pointer up to Programs to browse your Program Groups. The contents of these Program Groups should all be treated as buttons, with a single click of the mouse to get things going. EXCEPTION: The notification area on the taskbar (the area next to the clock) is not governed by the standard click, double click rules. This area is under the control of the individual applications.
|
|
||||||
ButtonsButtons are meant to be clicked on only once with the left button to make something happen. If you happen to press a button and then have an “OH NO!!” moment, you can usually move your mouse away, before you release the left mouse button, without setting anything off.
|
|||||||
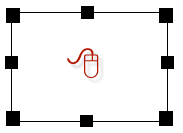
Selecting Items with a MouseClicking once with the left mouse button will select an object. You can tell it is selected because it will be highlighted in some way. Highlighting may turn the selected item a different color. Other times a box with sizing handles will appear around the selection. Selecting multiple objects can often be accomplished by holding down the left mouse button while dragging the mouse. Multiple objects can also be selected when combining CTRL or SHIFT with the mouse. Ctrl + Left Mouse lets you select several file objects one at a time while holding the Ctrl key down. Shift + Left Mouse lets you select a contiguous block of files or a block of text. Click on the first file, press the shift button and then click on the last file to select a block of files. To remember which multi select option is which, I think of CTRL as controlled multi-selection. |
|||||||
| |
|||||||
Moving
or Dragging and Dropping with the mouse |
|||||||
| Selected
items can be moved by holding down the left button while moving the
mouse. This is great for moving files or rearranging items in the startup
menus or favorites or moving text in your word documents. This can
also be a source of irritation if things start moving around and you
don’t know why. If you have accidentally pressed the left mouse button
(or the left touch pad button) while moving the mouse as soon as the
mouse button is released the object will be moved to the location being
pointed to by the mouse. |
|||||||
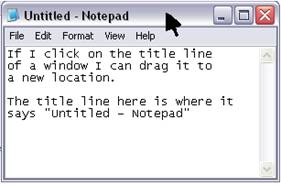
| To move a window point to the title bar, click the left button and then drag the window to the desired location and then release the button. Note: You can only move a window when it is not maximized. Shaking the window in Win7 or Vista will minimize all other open windows. |
|
||||||
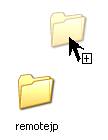
| ------------------------------------- If you drag a file or folder from one place to another on the same
partition (d:\bbb to d:\ccc), the object is moved. If you drag a file or folder from one partition to another partition or network drive (d:\bbb to c:\aaa), the object is copied, resulting in two identical files on your system.
|
|
||||||
| -------------------------------------------- Many applications allow text to be moved
via this drag and drop method also. To move text, highlight the text,
click the left mouse button and hold it while you move the mouse. The
mouse cursor will change while you drag the text to the desired location. |
| |
||||||
|
|
| ||||||
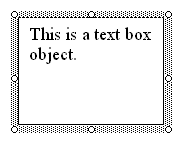
| Pass your mouse over the object until you see the mouse cursor change into a moving symbol. This can be inside the box or sometimes it will only appear when the mouse pointer is on the edges of the box between the resizing points.
|
|
||||||
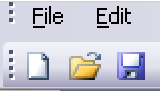
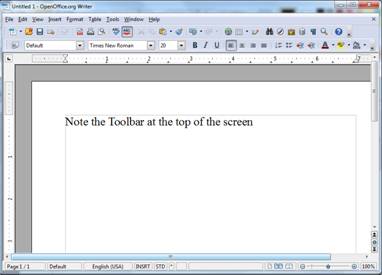
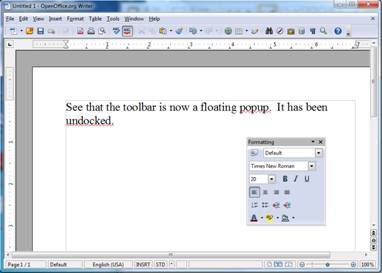
| Many applications have movable toolbars. Microsoft Word, Open Office Writer If you see little dot dividers on the
toolbar or menu, it might be a movable item. You can rearrange the toolbars, remove some tool bars, even undock the toolbars if you drag the mouse while over the toolbar handle. |
|
||||||
| |
|||||||
Resizing Objects |
|||||||
|
|||||||
To resize the object move the mouse cursor to the edge or corner. You will see the cursor change appearance. The arrows indicate the direction you can stretch the object. Hold down the left mouse button and drag the window to the desired size. |
|
||||||
|
|
||||||
| |
|||||||
Right Mouse Click |
|||||||
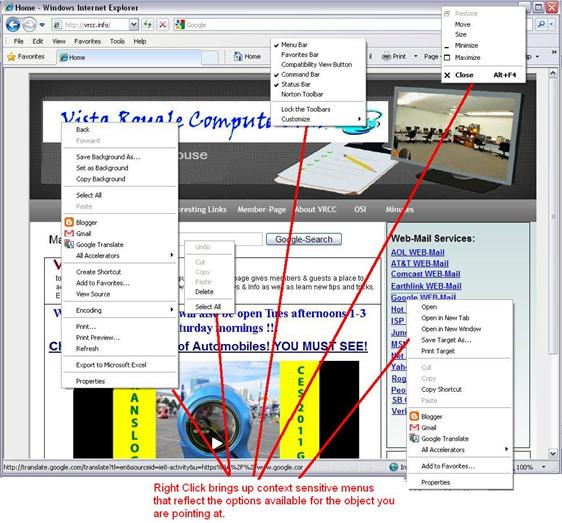
| Early DOS and Windows 3.1 applications didn’t do much with the right click. In fact my first 7 years of using a mouse I never found the right mouse to do anything at all. How things have changed! The current Windows environment makes extensive use of the right mouse button. A single click with the right mouse button will usually bring up a popup menu giving you choices. Make your selection by clicking once with your left mouse button. As you can see from the example above, depending on what you are pointing at you’ll get different shortcut menus. Use your right mouse button every chance you get! |
|||||||
|
|||||||
| A
scrolling mouse wheel was introduced in 1995. The scroll wheel is located
between the right and left mouse button. Not all mice have this scroll
wheel. |
|||||||
| The scroll wheel is used for scrolling. If scroll bar is present rolling the wheel will scroll the page vertically. The scroll wheel can also be used as a third mouse button by pressing on it.
Some modern mice can scroll horizontally as well as vertically, using either a tilting scroll-wheel (introduced by Microsoft) or a scroll ball (found on Apple's Mighty Mouse). In some applications (Adobe Reader) the Shift+ Scroll will scroll horizontally. In other applications like your internet browser, shift-scroll will go back and forwards though the websites you have visited.. The scroll wheel is used for zooming. In many applications (e.g. Internet Explorer, Mozilla Firefox, Opera and Google Chrome), holding down the CTRL key while rolling the scroll wheel causes the text size to increase or decrease, or an image in an image-editing or map-viewing program to zoom in or out, if such a feature is available. If you are using Windows 7, almost everything is zoomable with this method, even the desktop. |
|||||||
| |
|||||||
Mouse Properties in the Control Panel |
|||||||
|
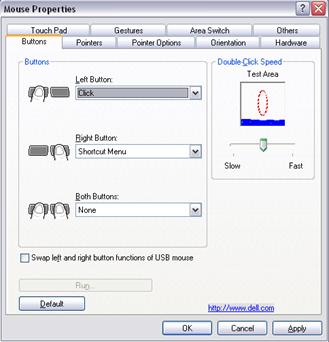
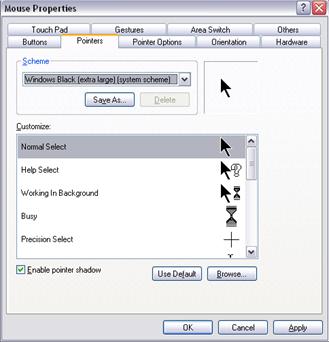
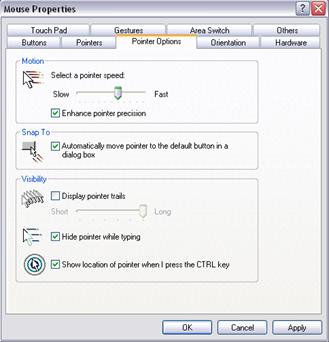
Once you’ve found the Mouse controls the Buttons tab, the Pointers tab and the Pointers Option tab make it possible to adjust the mouse for your use. |
|||||||
| The Buttons tab Older adults and youthful gamers often change the double click speed.
|
|
||||||
| The Pointers tab You can enlarge the pointers for better visibility. |
|
||||||
| The Pointers Options tab This is where you set the mouse speed. You can add trails if you have trouble following your mouse on the screen. If you don’t like the trails you can
still set the location pointer to help you find
the lost pointer. Pressing the CTRL key causes a big beacon to hone
in on the missing mouse pointer. |
|
||||||
 For example double clicking on a song in the list
box in iTunes
For example double clicking on a song in the list
box in iTunes 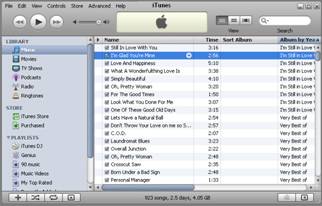


 .
.
 The Scroll Wheel